
Frequently Asked Questions for Teachers
1) How do I create a teacher account?
2) How do I prepare a unit for use in my class? What is a Run? How do I create a Run?
3) How do I add a student to a run?
4) How do I open the Teacher page? What can I do there?
5) How do I open and download teacher guides?
6) How do I launch the models?
7) How do I open and view screencasts? How do I play the model introduction screencasts?
8) How do I open and download the in-class student readings, and out-of-class student homework?
9) How do I view the class model gallery for each period?
10) How do I check student work organized by each student in WISE?
11) How do I check student work for specific steps in WISE?
12) How do I download student work to my computer?
13) How do I change a specific student’s password?
14) What if a teacher or student forgets his or her username/password?
15) How do I move students from one class period into another?
16) How do I change the name of a run?
17) How do I add additional class periods to my runs?
18) What do I do if I get an error?
Responses to Questions for Teachers
1) Creating a new teacher account
1. First, go to https://wise.berkeley.edu/ . Once there, click the button “Create WISE Account”
 2. The next page will ask whether you’d like to create a Student or Teacher account. Click “Teacher Account” to create a teacher account.
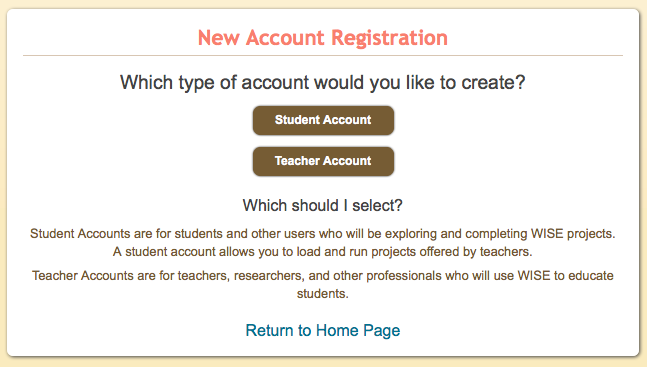
3. Fill out all required fields (most fields are required). When creating a teacher account, you must check the box agreeing to WISE’s Terms of Use.

4. Once you reach the Registration page, you’re done! Proceed to sign into WISE.
2) Preparing a unit for class use: What is a run and how do I create one?
A run is a subset of a project that you will create for every class but not necessarily for all sections (e.g. you will have one run for all your sections of Regular Biology and another run for all sections of AP Biology). You will need to set up your project run first in order for students to access the project. Students cannot register for your project run until you provide them with its Access Code, which is generated when you create a run.
Creating a run:
1. From the WISE home page, hover your mouse over the ‘Management,’ and in the drop down menu that appears, click on ‘Browse WISE Projects’
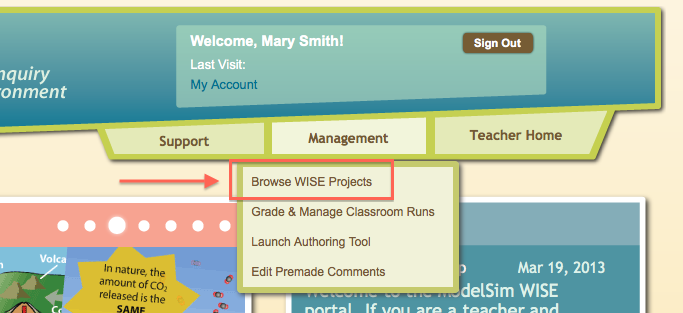
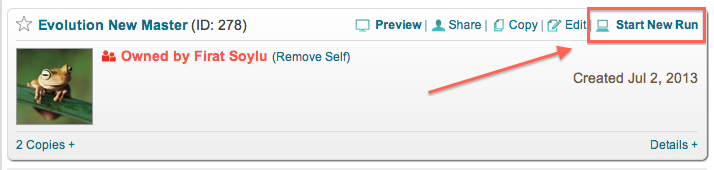
2. In your desired project, click ‘Start New Run’
3. Please follow WISE directions for Steps 1-3, once on Step 4 refer to the next step listed here
Please note:
On step 2 of 5, do not archive runs that are still in use. You can bypass this step by just clicking ‘Next’
Step 3 of 5: Select at least one classroom period/periods during which you’ll run the project, then click ‘Next.’
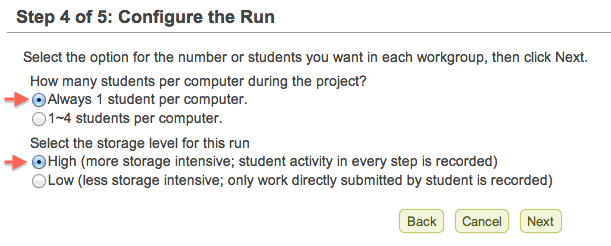
4. On Step 4 of 5: Configure the Run, please ALWAYS select “Always 1 student per computer” and “High” respectively. Then press ‘Next’
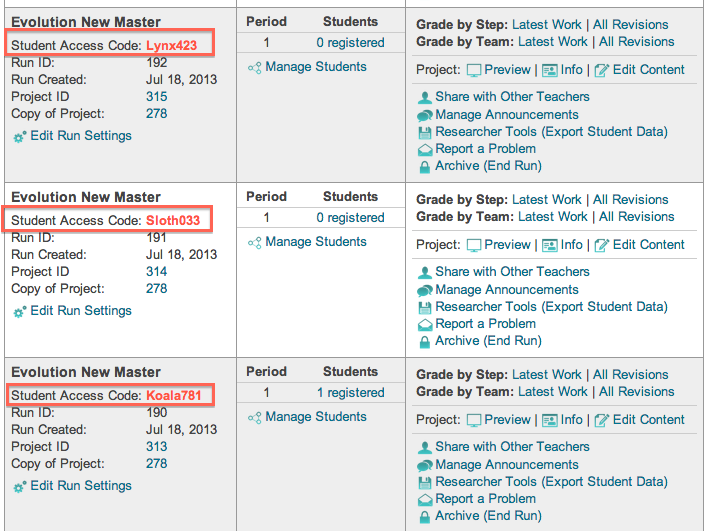
5. Once you have completed these 5 steps, your run is created. The class access code, which student will use to register for this run, is indicated in bold red. Each run will have a unique access code generated by WISE. You will be able to view this access code at any time from the Teacher Home page.

6. Under Teacher Home, you will be able to see all your current runs, along with each of their unique access codes in red, bold font.
3) Adding a student to a run
In order to add a student to a run, the student must be logged into his or her account, and use the access code created by the teacher.
1. Once logged in as a student, make sure you are on the ‘Student Home’ page by clicking “Student Home” as shown below:

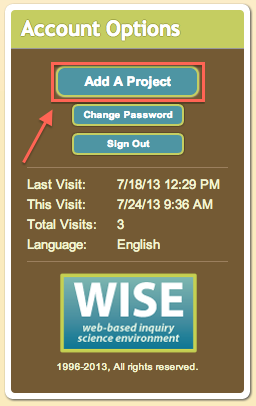
2. From the Student Home page, click ‘Add a Project’ located on the left side of the page.
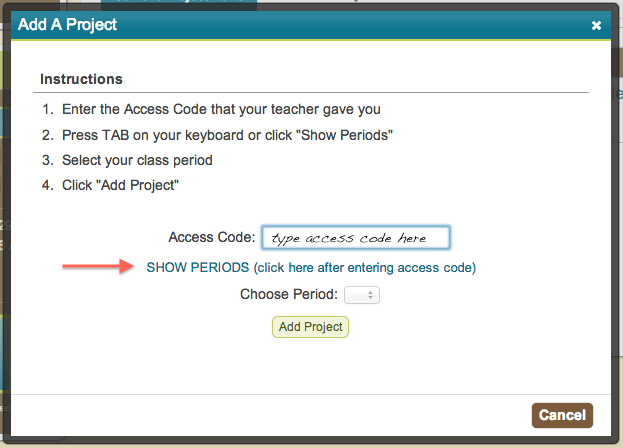
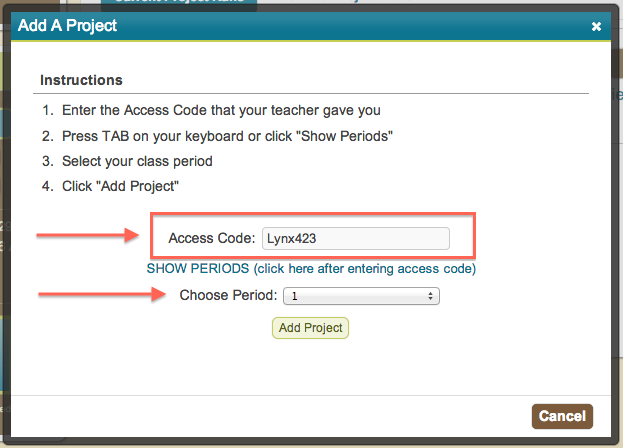
3. In the window that appears enter the Access Code to the Run you would like to join. Click the link below the Access Code field to select the student’s class period. Click ‘Add Project’ and the Run will now appear in the Student Home page.
Note: When a student first creates an account, they are already registered for the first run, using the initial access code. Students only need to go through this process when they are registering for runs after the first.
4) through 9) Navigating to the Teacher Page and what’s there
The Teacher Page is your source of all the materials you will need during the unit. From the Teacher page, you can access all the Teacher Guides, the student readings/homework, and launch the models and screencasts of model tutorials. You can also view the class gallery of students’ models. Please follow the directions below to reach the Teacher Page. If you know how to reach the Teacher Page, you can skip directly to directions to access the teacher guides, launch the models, access screencasts tutorials, access in-class and out-of-class student assignments/readings, and view the class gallery.
4) Accessing the Teacher Page: To access the teacher page, go to /info/ (the website that you are on). In the menu, under the “Units” drop-down, scroll over “Teacher Resources”, and click on the unit that you need a teacher page for. If you just want to type the URL in instead, the URL for the population biology unit is /teacherpages/popbio.html and the URL for the evolution unit is /teacherpages/evolution.html.
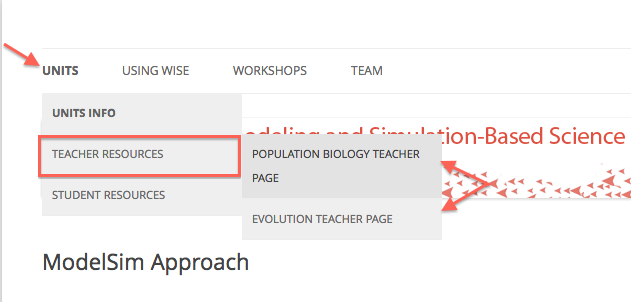
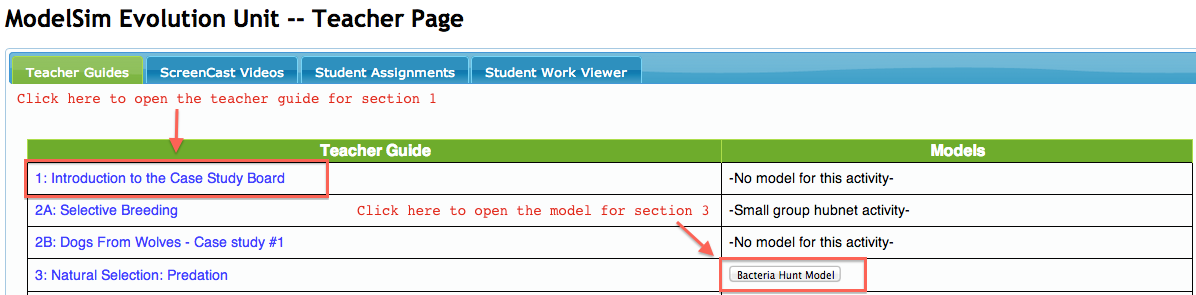
5) and 6) Opening up teacher guides and models: Once you click the unit that you would like a teacher page for, a window will pop up. This is the Teacher Page. Under the “Teacher Guides” tab, you can open the teacher guides for each section by clicking on that section’s name. The corresponding model for each section can be opened via the button to the right of the section title.
7) Launching model introduction screencasts: ScreenCasts are introductions to the models that include a video of using the models that explain all the basic functions of each model using video and an accompanying voiceover. You may simply let the ScreenCast play by itself for your class or you may mute the video and narrate yourself.
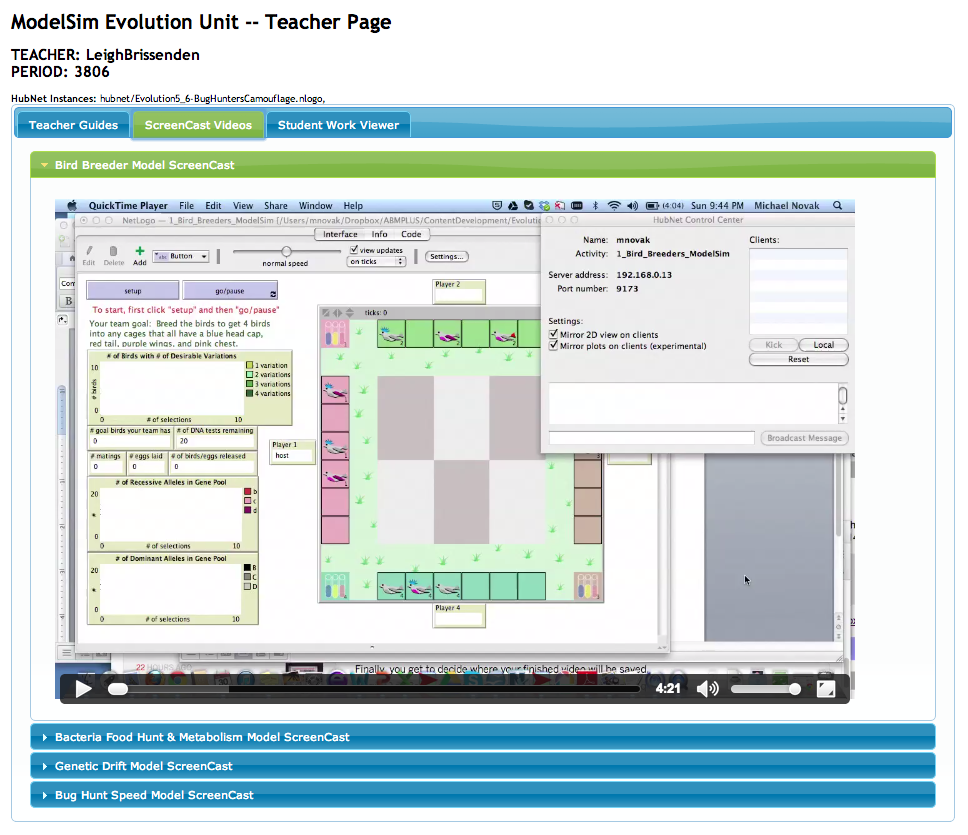
From the Teacher Page, select the ScreenCast Videos tab

The ScreenCast page will look like the following image. You can open different ScreenCasts by opening the tabs corresponding to the model you want to open

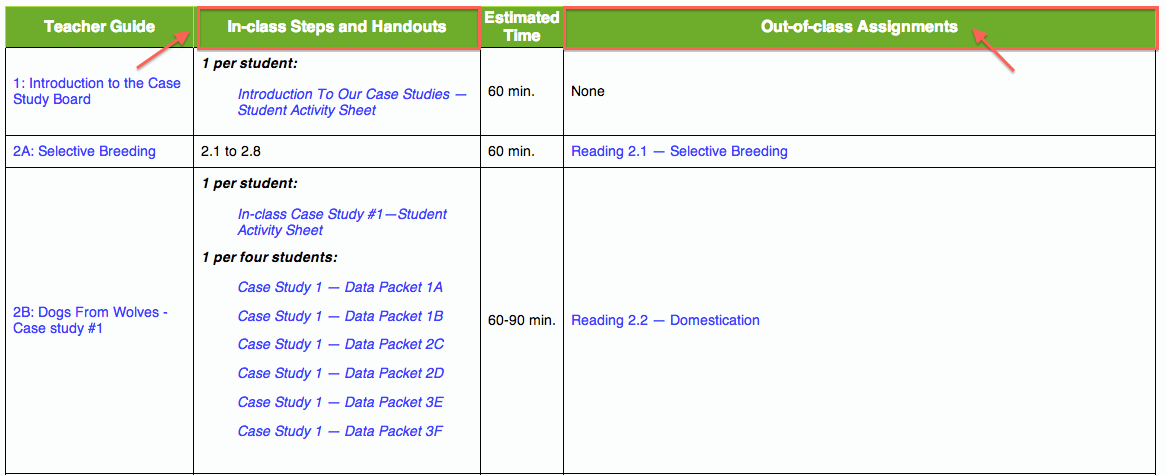
8) Viewing the in-class student activities and out-of-class student homework: The student readings and activities both in-class and out-of-class are located under the “Student Assignments” tab in the menu at the top.

In the second column, under “In-class Steps and Handouts” are all of the readings and assignments necessary for the in-class lessons and models. In the last column are the suggested out-of-class homework assignments for each section.
9) Viewing the class gallery: The class gallery is where the students post pictures of their models or graphs, so that they can be shown together as a class. To access the class gallery, select the “Student Work Viewer” tab from the Teacher Page.

From the “Student Work Viewer” tab, you can view the work for the Current Run, or add in a previous run’s number in the “Enter a run number to add to your list” to view student work from a previous run.

10) How do I check student work organized by each student in WISE?
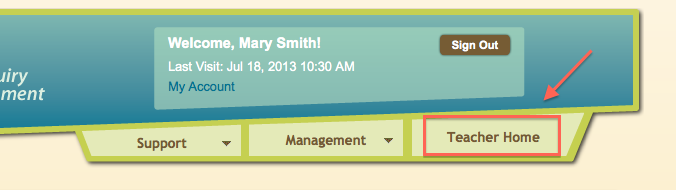
1. Go to the Teacher Home
2. In the Teacher home page, under the run whose progress and work you’d like to check, select “All Revisions”
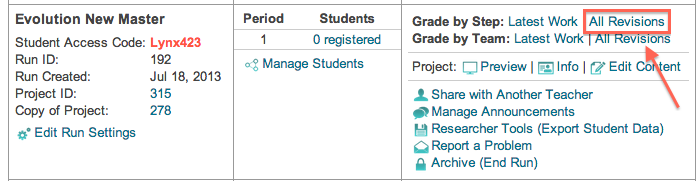
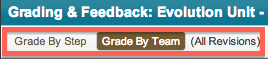
3. The following page will launch, listing all the activities and percentage of students that have visited each step of the activity. The default option will slow the “Grade by Step” button to be selected, in which you can see results organized by each step. Click the second button “Grade by Team”, to see results organized by each student.
4. Each student is organized by his or her class period. Select the class period for which you would like to see the student’s work next to the “View” button.
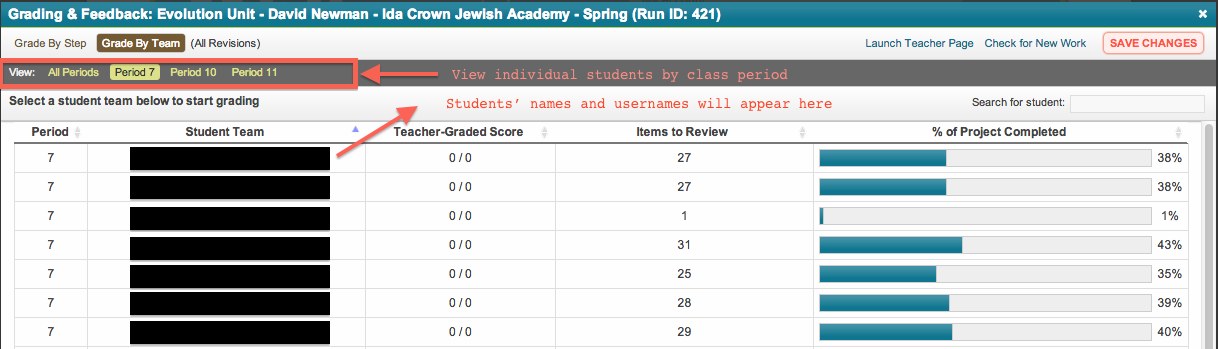
5. Once you click on an individual student’s name, you can view, grade, and comment on student work. If you make any changes, be sure to click ‘Save Changes’ before leaving the page. You can return to the full list of activities by clicking ‘Grade by Team’ in the top left corner. Do not use your browser’s back button.
11) How do I check student work for specific steps in WISE?
1. Go to the Teacher Home
2. In the Teacher home page, under the run whose progress and work you’d like to check, select “All Revisions”
3. The following page will launch, listing all the activities and percentage of students that have visited each step of the activity. The default option will slow the “Grade by Step” button to be selected, in which you can see results organized by each step. The second option, “Grade by Team”, will allow you to see results organized by each student.


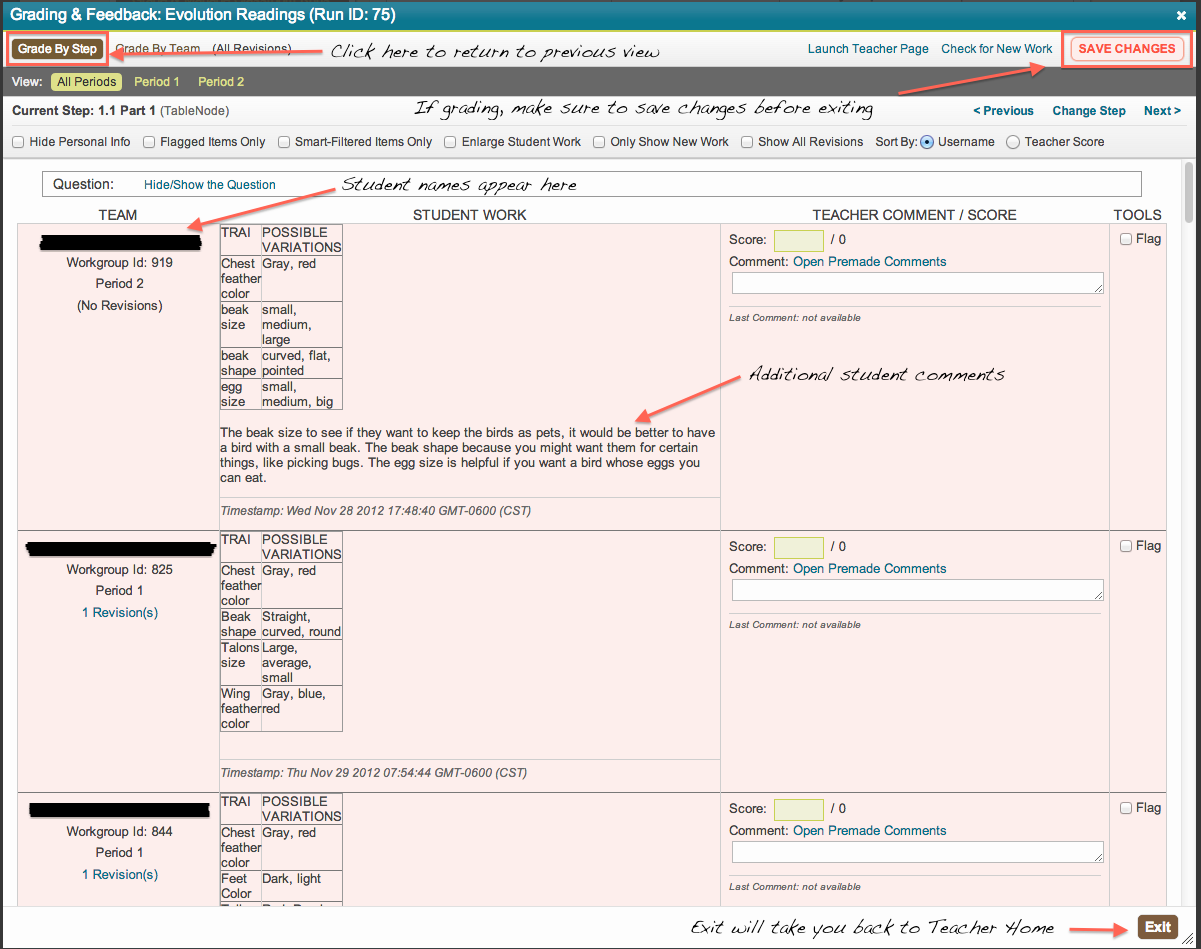
4. In order to see student work for a specific step, click on that step as shown below.

5. The image below shows the page that will launch. On this page, you can view, grade, and comment on student work. If you make any changes, be sure to click ‘Save Changes’ before leaving the page. You can return to the full list of activities by clicking ‘Grade By Step’ in the top left corner. Do not use your browsers back button.
12) Downloading and exporting student work
1. From the WISE home page, click on Teacher Home.
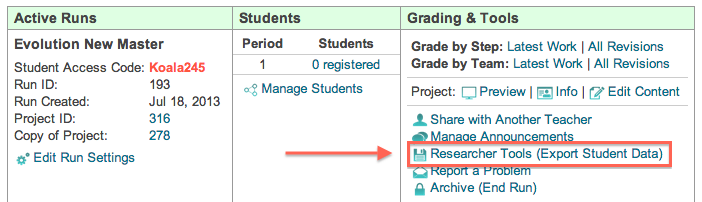
2. From the Teacher Home page and under the run whose student work you’d like to export, click “Researcher Tools (Export Student Data)”
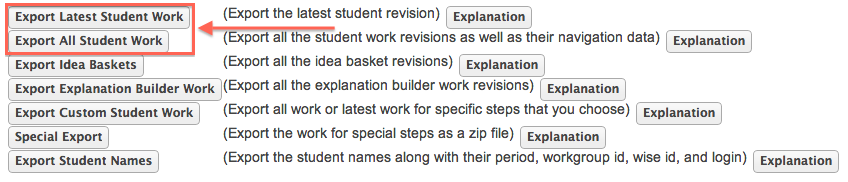
3. Select what student work you would like to export. The work will export to an Excel workbook. The ‘Explanation’ button can give you further information on what you will be exporting.
13) Changing a specific student’s password
1. From the WISE home page, click on Teacher Home.
2. Under your active runs, in the ‘Students’ column click on Manage Students
 3. Under Manage Students, you will see a list of your students. Each student’s username is in parentheses next to his or her name. To change a students password click ‘Password’

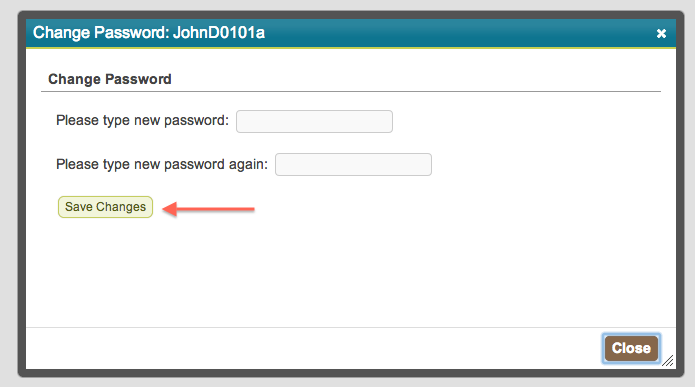
4. In the window that appears type and retype the new password. Remember to click “Save Changes” when you’re done.
Note: Previous teachers have given the suggestion to standardize all of the student passwords so that students do not forget their own passwords during class.
Return to questions
14) What if a teacher or student forgets his or her username/password?
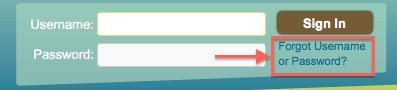
1. When logging into the WISE homepage, there is a link on the left of the login box that reads “Forgot Username or Password?”
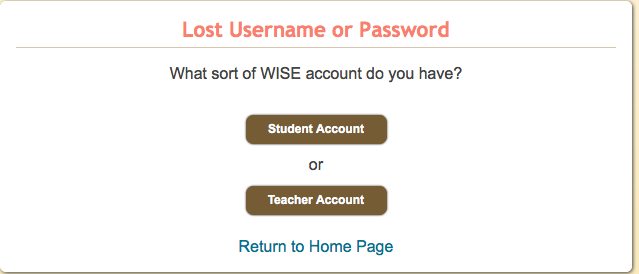
2. In the next window, choose if you are a student or a teacher. NOTE: The username for students is in a general formula. Student usernames consist of the FIRST name, the first LETTER of the last name, and the BIRTHMONTH (as two digits) and BIRTHDAY (as two digits). Example: John Doe has his birthday on March 2nd so his username would be JohnD0302.
15) How do I move students from one class period to another in WISE?
1. From the WISE home page, click on Teacher Home.
2. Under your active runs, in the ‘Students’ column click on Manage Students
3. Under Manage Students, you will see a list of your students. Each student’s username is in parentheses next to his or her name. To change the class period that a student is in, click “Period”

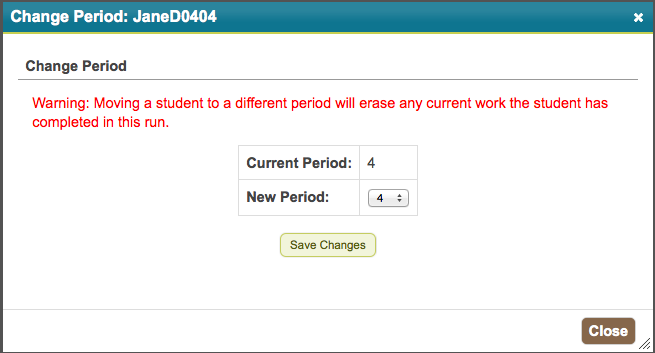
4. In the window that appears, use the drop-down menu next to “New Period” to change the class period in which you want to move the student into. WARNING: Moving a student to a different period will erase any current work the student has completed in this run.
16) How do I change the name of a run?
1. From the WISE home page, click on Teacher Home.
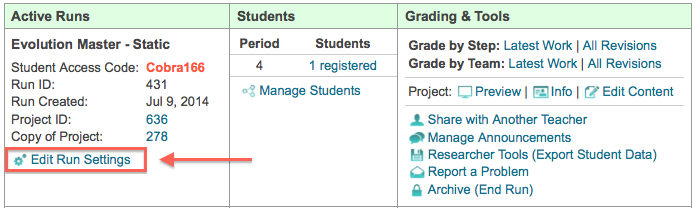
2. Under the run whose name you wish to change, click the “Edit Run Settings” button.
3. In the window that pops up, change the name in the “Run Title” box. Click “Update Title” when you are finished.
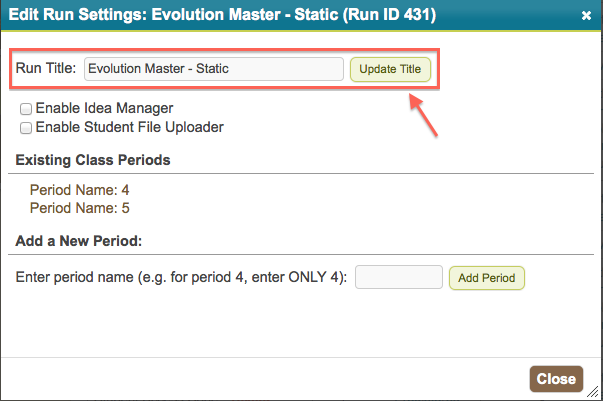
17) How do I add additional class periods to a run?
1. From the WISE home page, click on Teacher Home.
2. Under the run in which you’d like to add class periods, click the “Edit Run Settings” button.
3. In the window that pops up, add additional periods underneath “Add a New Period.” Click “Add Period” when you are done.

18) If you get an error
If you get an error at any point during your use of the ModelSim materials first try to find the problem in our “Troubleshooting” section. If the error persists, take a screenshot of the error or copy the error text and send it to modelsim-tech@ccl.northwestern.edu .